How to setup and configure a custom Ultr@VNC
SC
EXE with your router's settings STEP by STEP.
By Donald Muir (Dwalf)16 October 2005
This document is use at your own risk.
About:
Ultr@VNC SC (
Short for Single Click) is a remote support
tool. With Ultr@VNC SC you need only
setup a
helpdesk.txt and your local
router
(
There is no need to setup anything on the clients
computer
you intend to control), and in a few steps you will beadle
to offer remote support to your clients. Many
people today are opting to use Ultr@VNC for its powerful and
useful place in the IT Support market.
Ultr@VNC is protected by the
GPL (
General Public
License). Ultr@VNC is also support by enthusiastic
Internet community, meaning that no other company can match the
ideas or influence and speed of
development of Ultr@VNC, using cutting edge technology Ultr@VNC
will be showing the in years to
come.
Index:
Download Ultr@VNC SC custom.zip.
Unpack the ZIP file in to a folder.
Setting up your router to support Ultr@VNC SC.
Configure the helpdesk.txt.
Editing your company logo for EXE
Editing your Icons with IconoMaker.
Repack the files into a ZIP file.
Compiling your ZIP file to a EXE file on-line.
 Section 1:
Download Ultr@VNC SC custom.zip builds
Section 1:
Download Ultr@VNC SC custom.zip builds
Before you can start building your own Ultr@VNC SC support tools
you will need to download the
custom.zip build from UltraVNC web site.
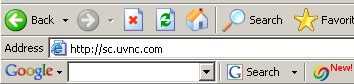
1. Open Internet Explorer and in the address bar type in the
FULL URL as indicated below.
http://sc.uvnc.com
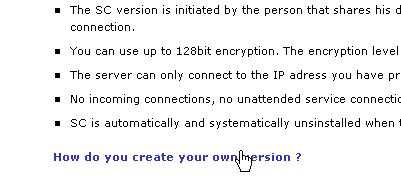
2. On the bottom of this web page you will see a links. Click on
the link How do you create your
own version as indicated below.
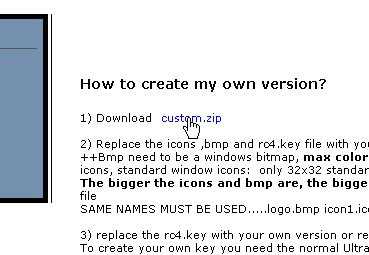
3. On the new web page you towards the top of the page you will
see a link called custom.zip.
Click on the custom.zip link as indicated below.
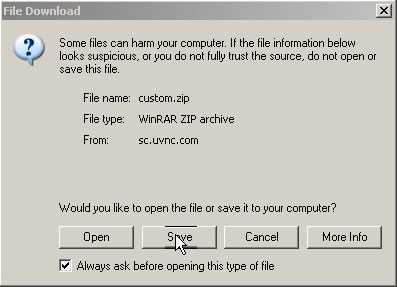
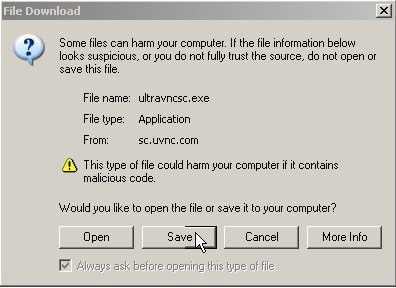
4. After you had clicked on the custom.zip link you will be
prompted to download. Click on the
SAVE button.
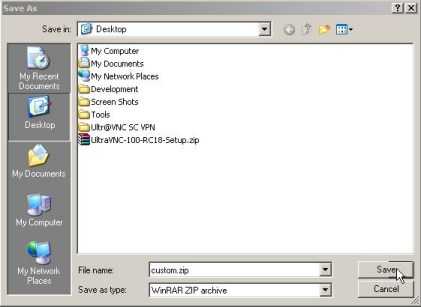
5. After clicking on
SAVE you will be prompted to select a
download location, ensure you folder
path is your desktop and click on
SAVE to save the
config.zip to your desktop.
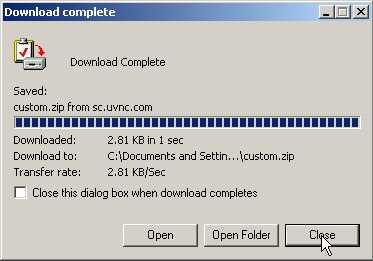
6. After downloading the file to your desktop you may be prompted
to
OPEN or
CLOSE the
download. For now we will just
CLOSE the download.
7.
Congratulation's you have successfully downloaded the
ULTR@VNC SC custom.zip.
 Section 2:
Unpack the ZIP file in to a made folder using 7-ZIP
Section 2:
Unpack the ZIP file in to a made folder using 7-ZIP
1. Before you start unpacking the compressed archive
file(
archive file = file with files inside) you
may need a program to do this with. There are many around on the
market. Example 7-ZIP,
WINRAR, WINZIP and Windows XP also has this function. For this
illustration we will use
WINRAR. You can download winrar from
http://www.rarlab.com/download.htm
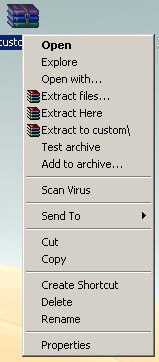
2. On the desktop right click on custom.zip (
mouse point must
be on the file) on your desktop and
click on
Extract to custom\.
3. After extracting the files you will see a new folder on your
desktop called
CUSTOM.
4. Double left click to open this folder and after opening this
folder you will see the following files.
5.
Congratulation's you have successfully unpacked the
files in a folder.
 Section 3:
Configure your Broadband Internet router to do Port
Forwarding.
Section 3:
Configure your Broadband Internet router to do Port
Forwarding.
1. You only need setting up your router, there is no need to
setup a clients router as Ultr@VNC SC
does a look back connection out of their system.
By default most routers are the gateway on your network and are
mostly accessible via a
HTTP (a
web page) to find your router you may need to ask your
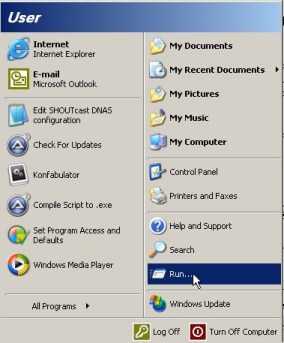
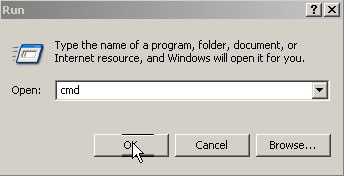
administrator or do the following. Click
on Windows
START button and click on
RUN.
In the run bar type
CMD as indicated below.
You now will see the
COMMAND PROMPT window, in the window
type
IPCONFIG
and press the
ENTER key on the keyboard when done. As you
can see as indicated below
the
DEFAULT GATEWAY on this computer is
192.168.123.254

We now can enter the gateway into Internet Explorer's Address bar
but still will need to find out what the
port is
(In most cases you need not put any port number at the
end, just enter the GATEWAY ADDRESS),
If you don't know you could run a port scanner to find where
another
HTTP server is running on your
subnet. Or ask the person who had setup your router or read the
documentation of the router or perhaps
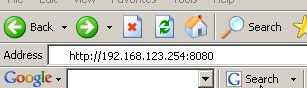
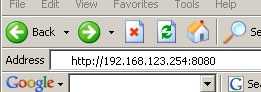
the router came with software. On this router PORT
8080
was used so i will be entering
http://192.168.123.254:8080 into Internet Explorer's Address Bar
as indicated below.
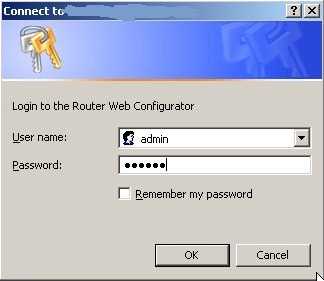
2. After connecting to your router via a web page you will need
to enter a Username and
Password. If your router has no Username and Password or still is
using the default
Username and Password i suggest you change it to something secure
before you find your
self hacked out of your router. When changing your password
ensure you don't lock
yourself out with mistakes, Most routers have a reset button what
will reset to defaults but
it does mean you will loose all your information and
configuration on the router.
3. After you have connected to your router you will need to
forward some
PORTS to
different computers on your LAN. What we are doing here is we are
telling the router to
watch for connection on certain ports on the Internet side
(
Ports are like Internet doors to
your network) and when it gets a connection from the
Internet side (
Connection comes
from CLIENT Ultr@VNC SC program) it must send the
connected
PORT to a particular
computer and PORT on your local network.
Example:
CLIENT SC (Helpdesk.txt directed) -> ROUTER WANIP:PORT
(Port Forward)-> LANIP:PORT
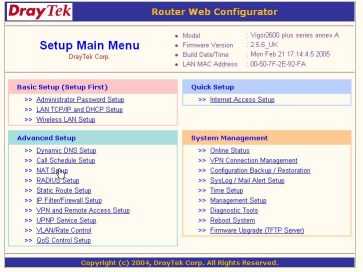
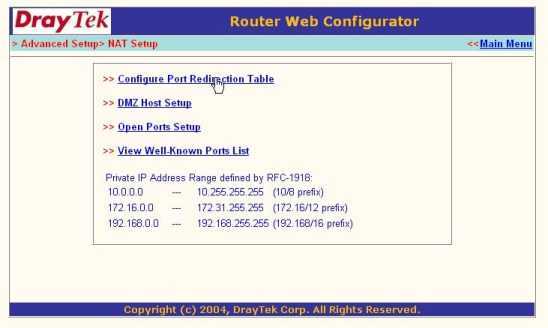
4. Here is a example
DRAYTECH VIGOR 2600 Setup. You need
to find the port forwarding
setting on this router it uses
NAT to
forward
ports. On the router setup page click on
NAT
Setup as indicated below.
On the next page click on
Configure Port Redirection
Table.
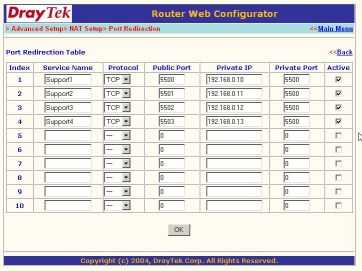
You now will need to change the settings of the
NAT PORT
REDIRECTION TABLE window.
Under
Service Name enter
anything you want.
Under
Protocol select
TCP
Under
Public Port (
This is the Internet side Port)
Enter the ports you'll use later in helpdesk.txt
Under
Private IP Enter the
IP Address of the
computer give support to the client (This is the
computer running
VNCVIEWER Listen on your
network)
Under
Private Port enter the port number (5500 is
vncviewer's default port number) of the
support computer running
VNCVIEWER Listen on your
network.
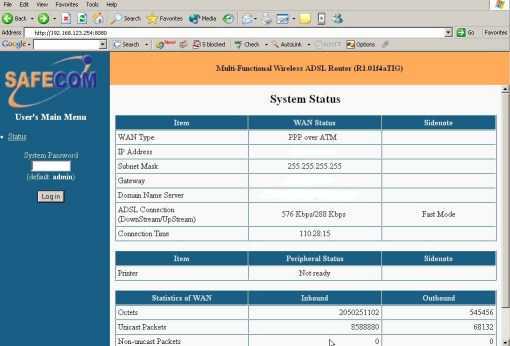
Now lets look at a different router and its setup. For this
Example we will use a
SAFECOM
Multi-Functional Wireless ADSL Router.
Same as before we connect to the router via
Internet
Explorer and enter the
Default Gateway as
indicated below.
We now will need to enter a
password only as this kind of
router does not require a Username
Enter your password and login to the router as indicated
below.
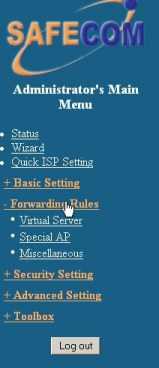
On this router you now will need to click on the
Forwarding
rules as indicated below and then
click on the
Virtual Server link.
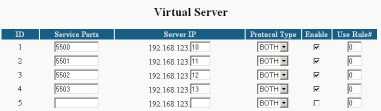
On the Virtual Server link you will be able to do your port
forwarding. As you can see with this
type of router you wont be able to select the local LANIP port
and will only be able to
PORT the
entire
PORT to the same port on the LANIP computer. This
is not a problem because
vncviewer.exe can listen on different ports (
default is 5500
unless changes in command line) on
the support computer. So on the support computer you would run
vncviewer with the following
parameters.
VNCVIEWER.EXE -LISTEN PORT
Example: vncviewer.exe -listen 5502
To setup port forwarding on this router enter as indicated
below.
Under
Service Port enter the port the router should
forward from the Internet side.
Under
Server IP enter the computer on the
LAN where
the
PORT should be sent to.
Under
Protocol Type enter
BOTH or
TCP
Remember to Enable the forwarded ports under Enable.
There are many different router with different setups, most of
them basically use the same
technology in port forwarding. Below is a links from Ultr@VNC
website for you to with more
router setups to look at.
routerconf.html
In some cases with older routers you cannot do Full NAT and you
may want to look then at
getting a router what has a lot more functions, You can get
really cheap good working routers
from.
http://www.ebuyer.com or
http://www.ebuyer.co.uk
Note you get two different kind of Broadband routers, one is a
ADSL router with built in modem
and the other is a Cable router, this is a router with no modem
and has a RJ45 connection to
connect to to your Internet with.
5. With Ultr@VNC SC using your Internet IP Address is not always
a good idea. Many people do
not have a static intranet IP Address and use a Dynamic Internet
IP Address. (Dynamic IP is a IP
what changes allot) If you do have a Static IP you could
associate a Domain name to it, but in any
case many people opt to use a Dynamic DNS name because there are
so many company's whom
offer these services for free.
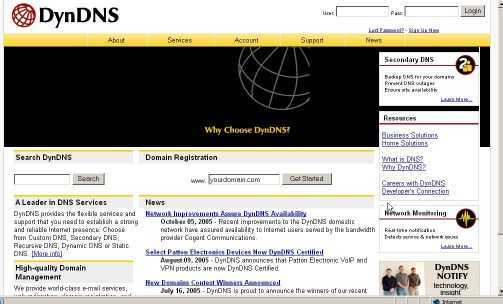
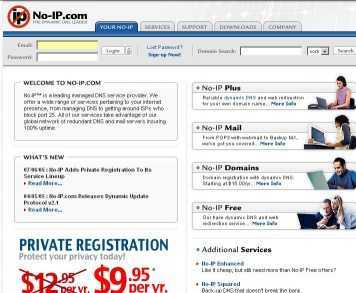
Most routers today can automatically update Dynamic DNS service
provides. Two Big Players in
this field is
http://www.no-ip.com and
http://www.dyndns.com
After you had registered (
use the free version) to one of
these two provider you normally will be
given a certain number of certain domains names for free. Choose
a domain name with a supplied
extension and keep the name professional. The Dynamic DNS service
providers will delete you
domain if its not been used for a certain time period.
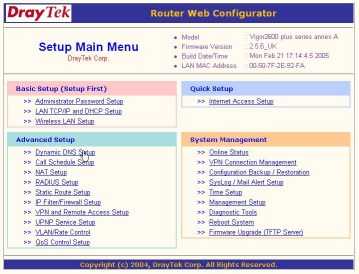
Lets look at the Draytek Routers
Dynamic DNS Setup. On the
Draytek main menu click on the
Dynamic DNS setup link to continue.
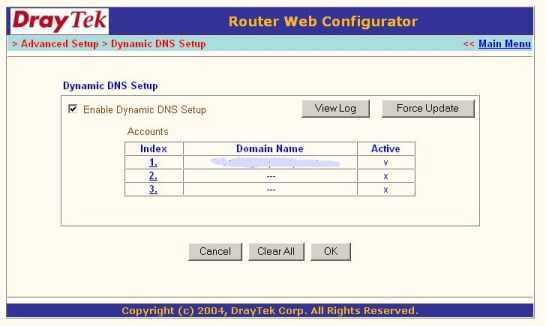
On the
Dynamic DNS Setup menu click on
Enable Dynamic
DNS Setup to enable this function
and then click on
Index 1 to setup the Dynamic DNS account
you have from
NO-IP or
DYNDNS. If you have more than one you can enter more in
the other Index sections.
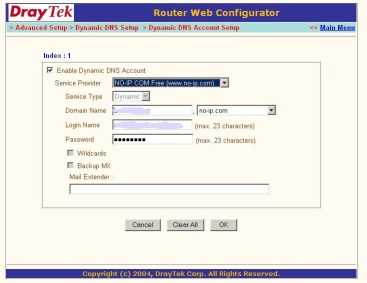
On Account Index 1 you will again need to click on Enable Dynamic
DNS Account.
Under Provider select the Dynamic DNS provider you are
using.
Under
Domain Name enter the domain name you chose and then
the extension in the drop down.
Under
Login Name enter the username the Dynamic DNS
provider gave you (
normally email)
Under
Password enter the password the Dynamic DNS provider
has give or you have chosen.
In some cases your router many not have a Dynamic DNS updater
function, Both
DynDNS and
NO-IP have software you can install on your computer to
update the domain to your Internet
IP. (
Very useful for dial up modems)
You can download them here.
DynDNS
http://www.dyndns.com/support/clients/
NO-IP
http://www.no-ip.com/downloads.php
6.
Congratulation's you have hopefully successfully
understand port forwarding and have setup
your own router.
 Section 4:
Configure the helpdesk.txt
Section 4:
Configure the helpdesk.txt
1. You now will need to configure the helpdesk.txt. The
helpdesk.txt tells winvnc where to connect
to. Since this configuration is meant to run on the clients
computer, the client computer (The
Computer you wish to control via remote connection) will need to
know how to find your
vncviewer.exe running in -listen mode. To do this we need to tell
the helpdesk.txt what Internet
WAN IP to connect to and at what ports it will need to connect to
(
This is why we needed to do
PORT Forwarding on your router).
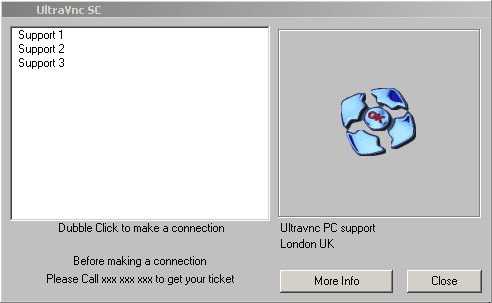
After the client has run the EXE they will see something similar
to below. There is Two main
ways of setting up the helpdesk.txt. One way as seen below where
the client see multiple support
people and double clicks on the support person they wish or was
asked to serve them another way
would be to create a EXE for each support person and use the
[DIRECT] option, this will connect
directly to the support person with out the clients
intervention.
Lets look at setting the helpdesk.txt to support multiple support
people in one
EXE.
Open the
HELPDESK.TXT in the
CUSTOM folder on your
desktop with notepad.
OPTION1:
[TITLE]
-- You can change this section, it is displayed at the top of the
EXE window
UltraVnc SC
[HOST]
-- This is the First Support person Section
Support Person 1
-- This is the Name of the First Support Person, you can change
this to
-connect 192.168.0.10:5500 -noregistry
--This is the Router IP and PORT you forwarded to the First
Support Persons Computer on the router.
[HOST]
-- This is the Second Support person Section
Support Person 2
-- This is the Name of the Second Support Person, you can change
this too
-connect 192.168.0.11:5500 -noregistry
--This is the Router IP and PORT you forwarded to the
Second Support Persons Computer on the router.
[HOST]
-- This is the Third Support person Section
Support Person 3
-- This is the Name of the Third Support Person, you can change
this too
-connect 192.168.0.12:5500 -noregistry
--This is the Router IP and PORT you forwarded to the
Third Support Persons Computer on the router.
You can continue to add more Support people if you want
or less if you want
[TEXTTOP]
-- You can change allot of the TEXT to reflect your company
info.
Dubble Click to make a connection
[TEXTMIDDLE]
Before making a connection
[TEXTBOTTOM]
Please Call XXX XXX XXX to get your ticket
[TEXTRBOTTOM]
(empty to clean line)
[TEXTRMIDDLE]
London UK
[TEXTRTOP]
Ultravnc PC support
[TEXTCLOSEBUTTON]
-- This TEXT is written on the CLOSE button and closes the
EXE
Close
[TEXTBUTTON]
-- This TEXT is written on the Info button and opens a web
page.
More Info
[WEBPAGE]
http://www.ultravnc.net
[BALLOON1TITLE]
-- This Balloons are little pop ups to inform clients on what
is
happening, You can change them to if you need to.
Establishing connection ...
[BALLOON1A]
5 min try period
[BALLOON1B]
If it fails, the software will remove himself
[BALLOON1C]
from your system.
[BALLOON2TITLE]
Connection active.
[BALLOON2A]
Warning, your desktop is remotely visible
[BALLOON2B]
You can break the connection any time
[BALLOON2C]
by using the close button
[WEBPAGE]
http://www.ultravnc.net
When your done
SAVE your edited file.
OPTION 2:
2. Let us look at the next option. The
DIRECT option
allows us to setup a EXE what will connect
directly to single computer with the need of the client to click
on anything. You will need to make
a EXE for each of the support people.
[TITLE]
-- You can change this section, it is displayed at the top of the
EXE window
UltraVnc SC
[DIRECT]
-- Here we add the [DIRECT] statement and note there is only one
HOST now
You cannot add more hosts as this will not work with the direct
option
[HOST]
-- This is the First Support person Section and only one
Support Person 1
-- This is the Name of the First Support Person, not really
needed anymore
-connect 192.168.0.10:5500 -noregistry
--This is the Router IP and PORT you forwarded to the First
Support Persons Computer on the router.
[TEXTTOP]
-- You can change allot of the TEXT to reflect your company
info.
Dubble Click to make a connection
[TEXTMIDDLE]
Before making a connection
[TEXTBOTTOM]
Please Call XXX XXX XXX to get your ticket
[TEXTRBOTTOM]
(empty to clean line)
[TEXTRMIDDLE]
London UK
[TEXTRTOP]
Ultravnc PC support
[TEXTCLOSEBUTTON]
-- This TEXT is written on the CLOSE button and closes the
EXE
Close
[TEXTBUTTON]
-- This TEXT is written on the Info button and opens a web
page.
More Info
[WEBPAGE]
http://www.ultravnc.net
[BALLOON1TITLE]
-- This Balloons are little pop ups to inform clients on what
is
happening, You can change them to if you need to.
Establishing connection ...
[BALLOON1A]
5 min try period
[BALLOON1B]
If it fails, the software will remove himself
[BALLOON1C]
from your system.
[BALLOON2TITLE]
Connection active.
[BALLOON2A]
Warning, your desktop is remotey visible
[BALLOON2B]
You can break the connection any time
[BALLOON2C]
by using the close button
[WEBPAGE]
http://www.ultravnc.net
When your done
SAVE your edited file.
3.
Congratulation's you have successfully finished the
helpdesk.txt
 Section 5:
Editing your company logo for the EXE
Section 5:
Editing your company logo for the EXE
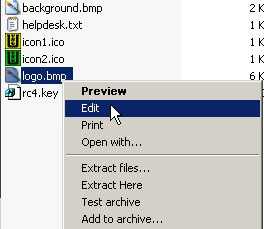
1. You can customize your EXE by editing the FILE logo.bmp and
placing your company on the
logo.bmp file. Put your logo on your EXE, open the
CUSTOM
folder and right click on the
logo.bmp
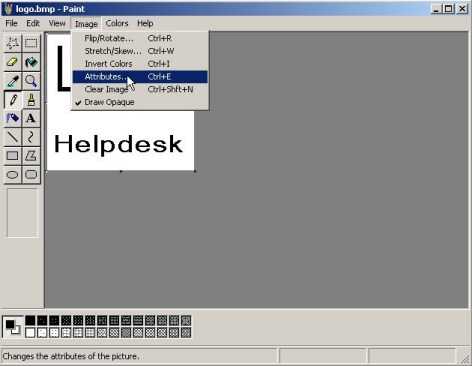
2. By default Windows Pain will open, but you can use other
editors as well to change the SC
Once the logo BMP file is open you can edit the image. By default
the image is
black and white
to reduce the size of the EXE but you can add color by clicking
on the
IMAGE tab and selecting
ATTIBUTES. You can also add your own image as long as its
the same size as the logo.bmp

3. On the
ATTRIBUTES windows click on
COLOR and
then click
OK.
4. When your done editing your logo.bmp
SAVE your
file.
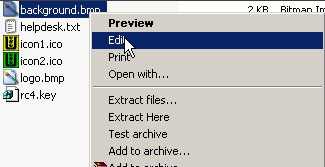
5. You can also change the background of the EXE by editing the
file
background.bmp in the
CUSTOM folder by following the same instructions as
above.
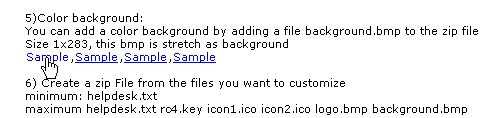
6. You also can get some free different colored samples on
ULTR@VNC website click on the link
below and save the files SAMPLE as shown below in your CUSTOM
folder, delete the old
background.bmp and rename the new BMP file you downloaded to
background.bmp
http://sc.uvnc.com/index.php?section=13
7.
Congratulation's you have successfully finished the
editing your logo and background BMP
 Section 6:
Editing your Icons with IconoMaker
Section 6:
Editing your Icons with IconoMaker
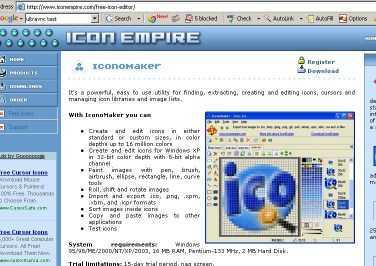
1. You can edit the icons to reflect your company logos too. You
will need a icon editor to edit the
icons and save them you can get a free icon editor at
http://www.iconempire.com/free-icon-editor
2. The there are two icon files you can edit.
Icon1.ico is the icon file the client will see running in
the Windows task bar.
Icon2.ico is the icon associate to the EXE file you client
download from you.
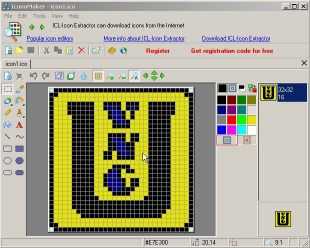
3. After you installed Iconomaker you can start using it Open and
close iconomaker and insure you
associated it to open .ico files when it asks you when
you open it for the first time.
4. You now can edit the icon files by opening the
CUSTOM
folder and right click on a
.ico file and
select
OPEN WITH and then select
ICONOMAKER. (You
only need do this once and then
EDIT only after that) When done remember to
SAVE your
files.
5.
Congratulation's you have successfully Edited your
icons.
 Section 7:
Repack the files into a ZIP file
Section 7:
Repack the files into a ZIP file
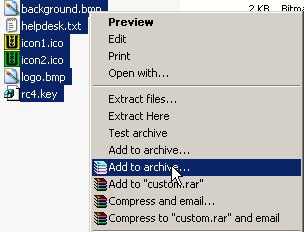
1. we now need to repack all the files in the
CUSTOM
folder into a zip file. For my demonstration i
will be using winrar as above in Section 1. To repack all the
files into a single zip file select all
the files by
highlighting them all and right click with
your mouse on a blue highlighted area and
on the menu select
Add to archive.
2. In winrar
change the file name to a name you would like
your EXE to be with the
.zip extension
at the end. When done click
OK to create the
archive.
3.
Congratulation's you have successfully repacked the
files into a zip archive.

 Section 8:
Compiling your ZIP file to a EXE file On-line
Section 8:
Compiling your ZIP file to a EXE file On-line
1. Now we can compile our zip file to a exe file on line. To do
this we need to open a web page on
Ultr@VNC. Click on the link below.
http://sc.uvnc.com/index.php?section=19
2. For this demonstration we will use the UltraVncSC based on
RC23. In the following fields enter
as below.
Under
Userid: foo
Under
Password: foobar
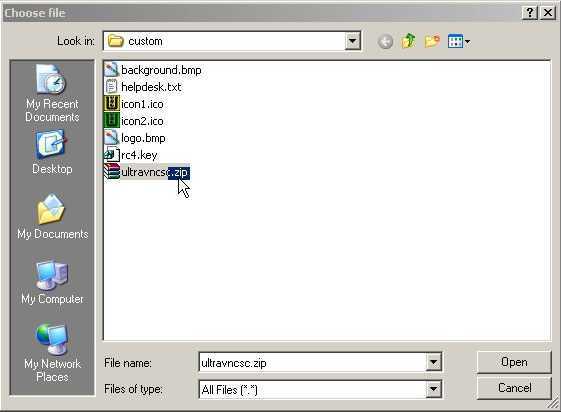
3. Next you will need to click on the Browse button and select
the newly created
ZIP file in the
CUSTOM folder you have made.
4. When done selecting the zip file, click on the
Submit
Query button to continue.

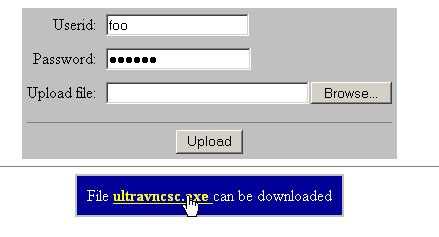
5. After some time the web page will redirect and you will have
the option to download the EXE
file, click on the filename.exe at the bottom on the web page to
download the exe file.
6. After you click in the EXE you will be prompted to save the
file, Save the file to your desktop.
7. On your desktop you will now see your new Ultr@Vnc SC EXE, you
may now upload it to your
website.
8.
Congratulation's you have successfully Created a
Ultr@Vnc SC EXE.
You will need to do some testing on your new Ultr@Vnc SC EXE,
note you cannot run the exe on your
LAN if your helpdesk.txt is set to connect from out side your
network to your network. Ask a friend on
another site or client to test. Unless you change the
helpdesk.txt to use your LAN IP ADDRESS and not
your WAN.
You will need to download ULTR@VNC and install it on your Support
people computers and run
vncviewer.exe -listen on each computer as reflected in
helpdesk.txt and the router.
You can download Ultr@Vnc from the link below.
http://prdownloads.sourceforge.net/ultravnc/UltraVnc-101-Setup.zip?download
You can also use the UltraVNC SC client Creator tool to create a
Off line SC build
http://forum.ultravnc.net/viewtopic.php?t=4046
Or do a Online Test with this tool.
http://forum.ultravnc.net/viewtopic.php?t=4535
Or if you don't want to make and EXE and want the client to enter
the details use this tool.

